
You are the one inspired to learn something new that can help you to start an amazing career or switch to the modern way of Building Application. Then you are on the correct page! Here, you will learn Getting Started with OutSystems that will not only help you to learn the concepts but you will be able to build your first app too.
Let’s Start with Low-Code
Low-code is a software development approach that enables the delivery of applications faster with minimal hand-coding. It enables developers to skip hand-coding, speeding up the process of getting applications to production. We can say it’s the modern way to develop applications which resorts to visual development that abstract and automates every step of the application development lifecycle.
Don’t think of it like the no-code!
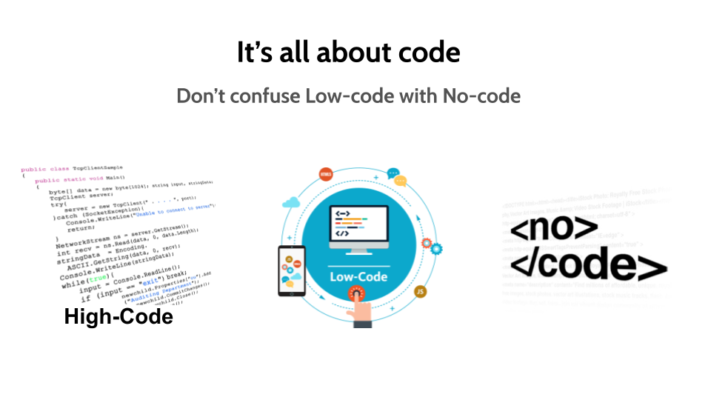
How is it different from no-code?
No-code solutions also feature drag-and-drop, visual development. Indeed, both low-code and no-code platforms are built with the same thing in mind: speed. But unlike low-code, they mostly cater to business people or others in IT who may not know any actual programming languages and want to build an application for a specific use case. The no-code has capabilities to build the small catalogue kind of application where you do not make the complex logics and it could be done via dragging the using the pre-built elements.
Ohh! The High Code
You already know where you have to start everything from scratch with the line of code and you build every aspect of the app like its architecture, database, user interface, and everything.
OutSystems As Low-code Platform
When selecting a low-code platform, you need to look beyond just the speed of development, and validate that the platforms make use of standard technology to avoid lock-in and that they cover all the necessary non-functional requirements of security, scalability, performance just to name a few.
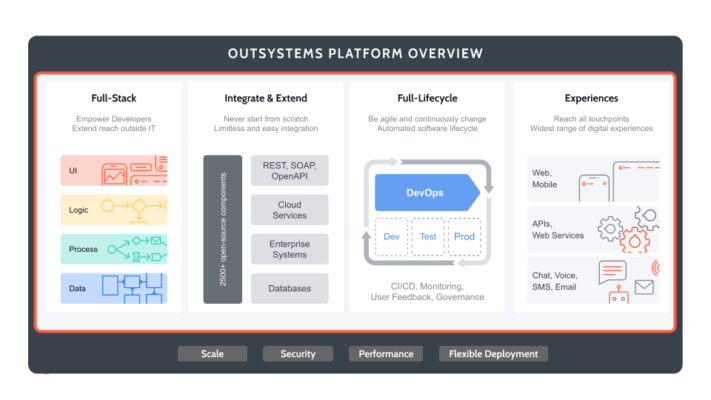
The OutSystems provides an environment that empower developers to extend reach outside IT. Through a single platform you can build the user interface, logic, processes and database.
Again it’s a low-code that enables you to extend the application with easy integration. It has 2500+ pre-built components that helps to accelerate the development and extensibility allows it to integrate with any API like REST, SOAP, Cloud Services, Enterprise Systems, and Databases.
The OutSystems has DevOps capabilities for the lifecycle management. It provides three different development environments for Development, UAT, and Production.
With Outsystems, you can develop Web Apps, Mobile Apps, APIs, Web Services, or any Chat, Email, Voice application through a single platform.
Overall, you get Scalability, Security, Performance, and the flexible deployment complaint with complete lifecycle.
The Service Studio
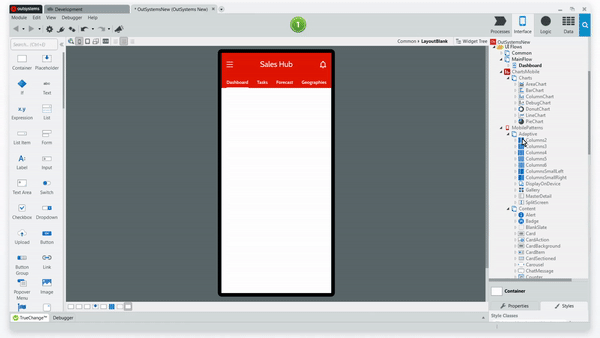
Once the platform is understood, we should talk about the Service Studio where we build Web & Mobile Apps. Service Studio is the OutSystems low-code and visual development environment that allows you to:
- Create applications and Modules on the server
- Create user interfaces for Reactive Web and Mobile Applications
- Define the data model
- Define business processes and timers (batch processes)
- Debug your apps
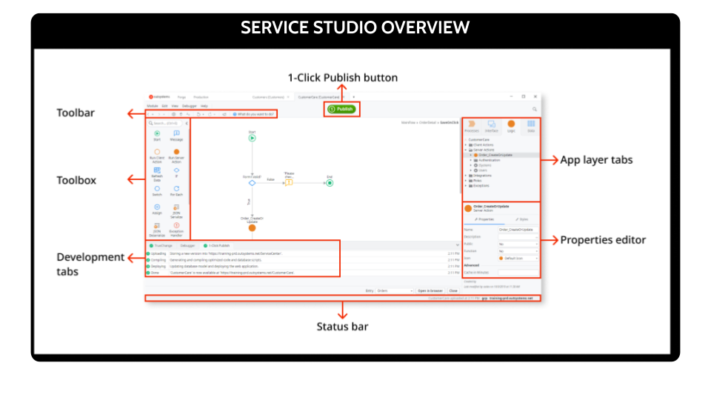
Let’s look into the workspace of Service Studio where you design, deploy, and debug the modules of your applications.
- It has a main editor where you design the interface and logic of your application.
- Toolbar Contains shortcuts to the most common operations.
- Toolbox Contains the tools and widgets to develop the screens and logic of your application.
- Development area displays TrueChange, Debugger Tab, 1-Click Publish Tab, Search Result Tab
- Status bar displays information about the user and the current environment, and when the application was last published.
- Application layer contains the elements of a specific application layer – processes, user interface, logic, and data model.
- And last is the 1-Click Publish button that starts the deployment of your application module to the current environment. If your module has errors, this operation isn’t available.
Based on the overview we can say that service studio helps to build the serious applications that you can build fast, right, and for the future.
So, Where to start?
Starting with OutSystems is only matter of following 4 steps –
Step 1: Create your free account OutSystems Account.
Step 2: Download and install Service Studio
Step 3: Follow steps written in the Guide one by one and BUILD YOUR FIRST APP.
Note: Get resources to build your first app here. The hand-on is a better way to get started.
Once you have built your application, you can submit this here with your experience and you may get a chance of free mentorship for your further learning of OutSystems.
Step 4: Continue your learning with 14DaysOfOutSystems Challenge and become OutSystems Reactive Developer.
Still have any doubts? Feel free to connect with me over LinkedIn 🙂